BRICKWORK IN THE GARDEN - BRICK LAYING.
Laying bricks is a straightforward process for any DIY enthusiast. Bricks can add maturity and a warm effect to many gardens. Learn about brick laying here.
The brick walls of a house have two primary physical functions. One is to hold up a roof, and the other is to form a framework around a set number of rooms (a) for privacy and (b) to stop the wind from getting in. They are also useful for hanging pictures; and of course a doorway would not be a lot of use without a wall.
A garden wall on the other hand does not need to have a physical function. It can simply look nice - just by being there.
It can also have functions as well; such as holding a greenhouse up, retaining a soil bank, forming an edge or division, housing a BBQ, raising a planting bed, enclosing the wheely-bin or compost heap (sometimes one and the same!), helping to provide a level site for the patio, screening off neighbours, creating rooms, or simply acting as a boundary. They are also quite useful for hanging gates on, and building arches in!
Most garden plans include a wall, and of course the Victorians loved their walled gardens and brick laying; or did they love their gardens walled?
Garden walls have one disadvantage. They can be expensive. One way around this is to cut out the middleman - the bricklayer. (Most of the good ones are busy building houses again anyway). That means someone else will have to do the bricklaying - build the wall - You! (Yes you can).
Most garden walls are less than a metre high - well within the scope of any `handy' person. In this article we will be dealing with the basics to get you up to this height. In following articles we will be looking at more substantial, ornate and stone walls.
PLANNING before you start brick laying
All garden walls should be designed on a piece of paper - a plan. It may well be that you only want a short straight wall, and don't see the point of putting a straight line on a piece of paper. So, let's give it the `5W' test - What, why, where, when, who? Why do you need a wall - instead of a fence, trellis, shrub border or a few planted tubs? Where is it going to go - will anything be in the way (Services, tree roots, etc)? Who is going to build it; order the materials; clean up after you etc? What is it for - what bricks are you going to use; there are many types - not all will be suitable. When are you going to do it - how long will it take; will you have the time?
On your `master plan' you should plot the dimensions of your wall, which will enable you to work out the measurements for the foundations (footings). Then you can estimate the quantities of materials you will require. When designing your wall, aim for measurements that are in multiples of the size of bricks or walling blocks that you are going to use. The sizes are usually quoted as being `nominal'. This simply means that this is what they should measure once they are laid with the recommended 10mm width joint of mortar.
QUANTITIES
Bricks normally measure 215 x 102.5 x 65mm (8.5 x 4 x 2.5in) but can vary from brick to brick. With the mortar joints added, this normally means 4 bricks for every 900mm (3ft) length of wall and 4 bricks for each 300mm (1ft) height of wall. Allow 58 bricks for each square metre surface area of wall (48 per square yard). You should also allow an additional 5% for cutting and breakages. These quantities are for a single width wall. For a double wall, you simply double the quantities. Don't forget to allow additional bricks for building the piers, including for any additional height of the piers.
If the wall is to have an ornamental as well as functional use, then it will be a good idea to be aware of the orientation. For instance, if your house and garden faces south and you propose to build a wall across the garden (i.e. from W to E), then the wall face that you see will effectively face north. It will get little or no sun, and could be quite somber in appearance. It could also `mature' quite quickly, with algae and other growths.
On the other hand, if the wall that you see faces East or West, then a recessed mortar joint would enhance the brickwork in the morning or evening sun respectively. If the wall is exposed to the normal Westerly rain, then a different type of joint is called for - together with a modified mortar mix.
PIERS
Walls over certain lengths and heights will need to be strengthened at regular intervals with piers. These piers will have to be provided for when constructing the foundations. Even the smallest single brick-width wall will benefit from piers at any free standing end.
Any single-width wall over 300mm (12 inches) height should have piers at intervals not exceeding 3 metres (9ft 9in). Walls shorter than this will also benefit from the inclusion of piers. The piers should be no less than double the thickness of a single brick wall. They can be simply constructed with galvanized wall ties, but it is quite easy to bond a pier into a single brick width wall. There are several ways of doing this.
FOUNDATIONS
Once the dimensions of the wall have been determined together with the position of the piers, the foundations can be designed. Everything to do with `hard landscape' requires suitable foundations. Walls are no exception, and I make no apologies for repeating myself: I cannot over-state the importance of proper foundations.
For most garden walls, a `strip' footing is used. This is simply a straight-sided trench filled with concrete.
The trench should be dug out of firm soil. It should not be dug out of ground that has been recently filled, such as is often found on building sites. If your trench starts to fill with water from surrounding ground, then expert advice should be sought before proceeding. This is not likely to be the case in these days of low water tables.
Your trench bottom should be firm base soil. If it is not, then you will need to dig deeper than the recommendation and back fill with compacted hardcore before filling with concrete.
The overall depth of your trench should allow for the stated depth of concrete, and also for two courses of bricks to be laid below ground level. This will enable planting to be carried out at the base of the wall, or for paving to be laid right up to the wall if that is to be the case.
DIMENSIONS OF CONCRETE FOOTINGS
Minimum depth of concrete = 150mm (6 inches)
Width of trench/footing = 300mm (12 inches)
(Where piers are to be incorporated - normally double brick width - then suitable footing (450x450mm) should be allowed for, and accurately sited within the footing.)
Double width wall... (213mm or 8.5 inches)
Minimum depth of concrete = 225mm (9 inches)
Width of trench/footing = 450mm (18 inches)
(If piers are to be included, then the concrete pad for the pier should extend at least 150mm on each side of the pier. i.e. for a 325mm pier (One and half bricks) the pad should be at least 625mm (25inches) wide and for a 450mm pier (Two whole bricks) then the pad should be at least 750mm wide.
NB. For stand-alone piers - pergola, gate supports etc - the footing pad should be considerably wider than above and will be covered in a following article.
If you aim to have the first two courses of bricks below ground level, then you will need to excavate a further 150mm, to allow for the two courses of bricks and mortar joints.
The concrete for the footing should be mixed in the volume ratio of 1:6 (Cement to `all-in' ballast). Volumes should be gauged accurately. The mix must not be sloppy and wet, refers) but should have the least amount of water added to the dry mix in order for it to be workable. An overly wet mix will considerably weaken the strength of the concrete footing. A wet mix may be easier to spread, consolidate, and float-finish to a level, but it is wrong.
The concrete is placed into the trench and well compacted with a punner/rammer to ensure that there are no air voids within the footing. If your mix has the right water content, then you can leave a semi rough surface by tamping with the edge of a board. This will help to bond the first course of mortar and bricks to the footing.
Allow three to four days before starting your brickwork, and during this time make sure that the concrete is allowed to cure slowly. Place a sheet of plastic along the surface and secure with bricks or boards. The bags from your ballast can be used for this.
A problem can occur if building your footings in extremely dry conditions - seemingly unlikely as I write this. The dry sides of the trench can draw off the water from the concrete quite quickly. Concrete should never be allowed to dry too quickly. Anything that can be done to keep the surrounding soil moist will help, though you will not want water lying in the bottom of the trench. It will also help if you can spray the setting concrete each day. Do not drown it.
On sloping ground you will need to construct `stepped' footings. Ensure that any timber shuttering is sturdy enough to take the weight of the concrete and your compaction. This also applies, if some of the footing is above existing ground level. The timber shuttering must be up to the task of holding the concrete in place without any bulging or sagging.
LAYING THE BRICKS
You will be confronted by a huge range of bricks. Not all are suitable for exterior works, and some may only be suitable for sheltered positions.
Bricks come in many colours and textures, and various qualities. `Facings' are usually suitable for most exterior work for the `faced' edge is normally water and frost resistant. `Commons' are for interior work only. Ordinary quality bricks are suitable for most exterior situations, but can suffer if exposed to continual driving rain or severe frosts. `Specials' or `Best' quality are suitable for all exterior works including steps and retaining walls.
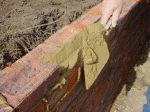
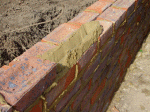
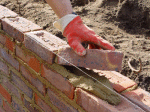
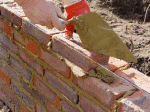
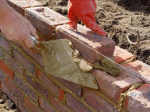
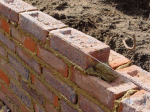
Before you even start to mix up the cement mortar for your first ever course of brick laying, lay out the first course of bricks without mortar - just to make sure that it all works out on the ground. Allow for the mortar joint between each brick. (10mm is ideal). If it is your first attempt at building a wall, try a dry run with a few courses. Use your spirit level in the vertical and horizontal positions to get used to it. You could even lay a few courses of a short wall onto a sheet of ply or hardboard, using a mortar mix. In particular, build a corner or end section to four courses high. The mortar can be cleaned off the bricks once it is semi-dry.
The Mortar Mix
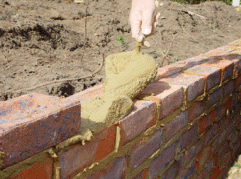
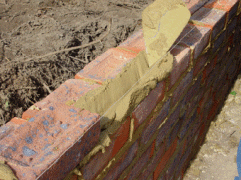
The mortar mix for laying bricks, should be of the ratio of 1 part cement and 5 parts soft builder's sand (1:5). In very exposed situations, or for brickwork below ground level, this mix should be modified to 1:4. Do not add more cement, thinking that you will have a stronger job - you will not; in fact it will be weaker.
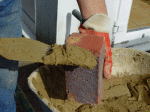
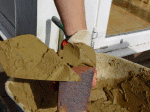
Add only enough water to make the mix firm and pliable, but not runny. If you bounce a dab on your trowel, it should not sag and should remain on the trowel when it is turned upside down. It may help to add some liquid plasticiser. This will make the mix easier to work. If you do so, then read the instructions carefully. Incidentally, all the mortar colourants that I have used have had a plasticising effect on the mortar.
For most of my work, I tend to leave the mortar mix in a wheelbarrow, moving it to where it is required. Spot boards are fine for the experienced bricklayer laying a long row of bricks, but not too efficient for the more time consuming ornamental walls. In the wheelbarrow, you can re-liven the mix from time to time with a shovel or trowel, adding more water (sparingly) when required. Do not mix more mortar than you can use within half-hour and make sure that you have a uniformly mixed mortar.
Best Selling Gardening Products
Popular Gardening Sections

Problems
Identify Weeds in The Garden - How to deal with weeds. Diseases and Pest which harm your garden and plants, learn how to prevent, deter and erradicate your garden problems.
Garden Problems
Pruning
Pruning Guide. Shrubs flower better with correct pruning. Many illustrations and examples of what to do - and when. Includes evergreens, roses, flowering shrubs, spring flowering shrubs and pruning for stem effect. This is our most viewed and comprehensive section,
Pruning
Gardening Businesses
Gardening Businesses listed in the UK counties and USA states. County and State Listings of businesses involved in Garden supplies and services. If you wish to be added to the Directory, please send us your information. Having problems, use the search box
Businesses
Gardening
In this section you will learn about Gardening Basics, Containers, Landscaping, Propagation and Soil.
Gardening
Gardening Gifts
Gardening Gifts and Reviews, Read Before you Buy
- Gardening Gifts Ideas
- Gifts For Her
- Gifts For Men
- Power Tool Gifts
- Cheap Gifts
- Personalised Gifts
- Wildlife Gifts
- Family Gifts

